
Internal Integration (POS App Development): Difference between revisions
No edit summary |
No edit summary |
||
| (One intermediate revision by the same user not shown) | |||
| Line 1: | Line 1: | ||
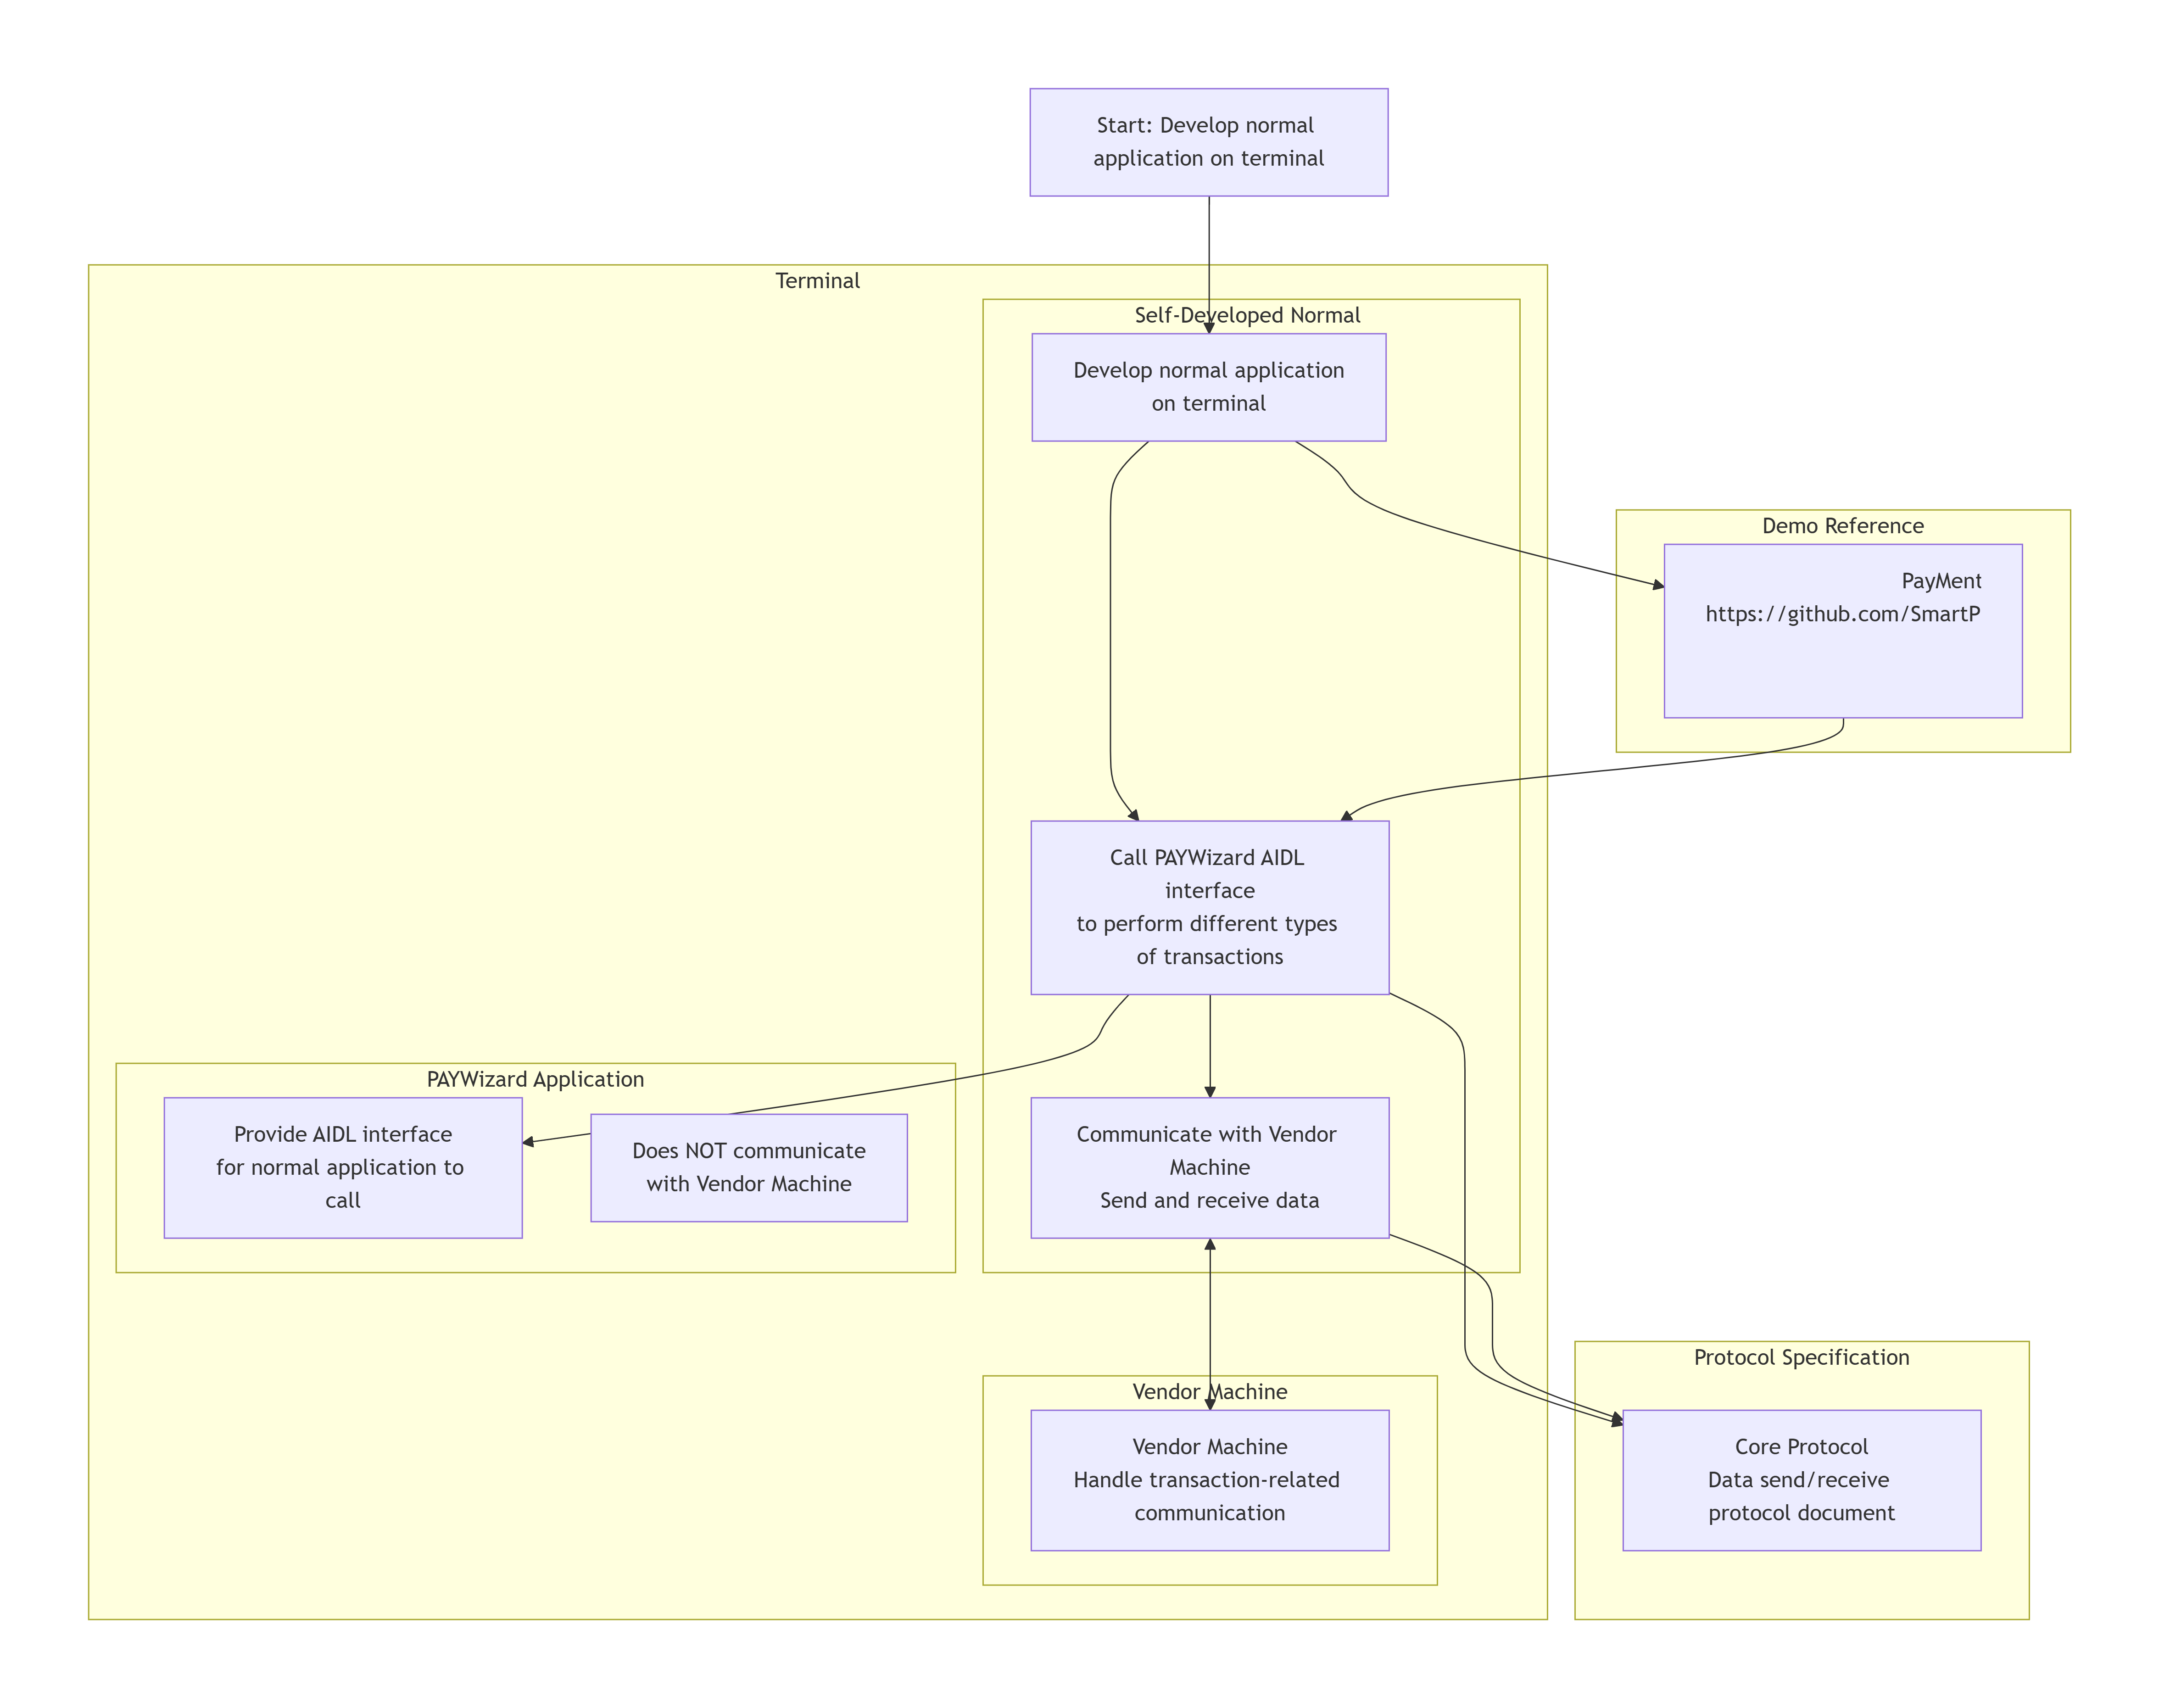
It is suitable for developing normal applications on the terminal. The application can call the AIDL interface provided by the PAYWizard application to perform different types of transactions. In this mode, PAYWizard does not communicate with the Vendor Machine; the self-developed application is responsible for communicating with the Vendor Machine. | It is suitable for developing normal applications on the terminal. The application can call the AIDL interface provided by the PAYWizard application to perform different types of transactions. In this mode, PAYWizard does not communicate with the Vendor Machine; the self-developed application is responsible for communicating with the Vendor Machine. | ||
===PAYWizard AIDL interface:=== | |||
[https://github.com/SmartPOSSamples/PayMentAIDLDemo/blob/main/app/src/main/aidl/com/wizarpos/payment/aidl/IPaymentPay.aidl Paywizard IPaymentPay.aidl] | |||
[https://github.com/SmartPOSSamples/PayMentAIDLDemo/blob/main/app/src/main/aidl/com/wizarpos/payment/aidl/IPaymentPayCallback.aidl Paywizard PaymentPayCallback.aidl] | |||
===PayMentAIDLDemo=== | |||
[https://github.com/SmartPOSSamples/PayMentAIDLDemo PayMentAIDLDemo] | |||
===Core Protocol=== | |||
Please send and receive data according to this protocal document:[[Core Protocol]] | Please send and receive data according to this protocal document:[[Core Protocol]] | ||
===Flow=== | |||
[https:// | [https://ftp.wizarpos.com/techsupport/ticket/flowchartofdevelopnormalapp.png Here is a flowchart] | ||
===APK=== | |||
[https://ftp.wizarpos.com/payment/PayMentAidlDemo_release_V1.0.6_20260114.apk PayMentAidlDemo_release_V1.0.6_20260114] | [https://ftp.wizarpos.com/payment/PayMentAidlDemo_release_V1.0.6_20260114.apk PayMentAidlDemo_release_V1.0.6_20260114] | ||
Latest revision as of 07:04, 30 June 2026
It is suitable for developing normal applications on the terminal. The application can call the AIDL interface provided by the PAYWizard application to perform different types of transactions. In this mode, PAYWizard does not communicate with the Vendor Machine; the self-developed application is responsible for communicating with the Vendor Machine.
PAYWizard AIDL interface:
Paywizard PaymentPayCallback.aidl
PayMentAIDLDemo
Core Protocol
Please send and receive data according to this protocal document:Core Protocol
Flow
APK
PayMentAidlDemo_release_V1.0.6_20260114
See also, internal-integration
Best practice for payment in D22(D3)/Q3(Q2)
For developing applications on the D22.
- Install the new accessory agent on D22(D3)/Q3(Q2)
- Install initconnectionmode on D22/Q3, configure master and slave. This step is usually pre-initialized at the factory and does not require further configuration by the customer.
- Install PAYwizard app on D22/Q3
- Set protocal of PAYwizard to DEFAULT on D22, and set the payment package name to com.wizarpos.opc
- Set protocal of PAYwizard to USB ACCESSORY on Q3, and set the payment package name to com.wizarpos.paywizard.demo